
• Skip to primary navigation
  • Skip to main content
  • Skip to primary sidebar

Robbins Farm Garden

A Cooperative Learning Project

  • About the Garden
  • Membership & Rules
  • Veggie School
  • Local History
  • Contact Us
  • 2022 Crops List
  • 2022 Garden Plans
  • 2022 Garden Schedule
  • 2022 Photos
  • 2022 Finances

Imposter or the Real Thing?!?

August 7, 2012 by Mike Smith

We are growing sweet potatoes for the first time this season, and we’re learning as we go along.  Unlike most of the other plants in our garden, sweet potatoes are NOT grown from seeds.  Instead, they are grown from “slips,” or small clusters of leaves that can be made to sprout on mature tubers.  For info on how to start your own sweet potato slips, click here.

Sweet potatoes come in either bush or vining varieties.  We bought our vining-type sweet potato slips, variety ‘Georgia Jet,’ from Burpee. NOTE:  some sweet potato slips that are sold as ‘Georgia Jet” are, in fact, imposters.  To tell the difference between the imposter and the Real Thing, watch your plants for blossoms.  If you see blossoms, (as in photo, below), then you have the REAL Georgia Jet variety!
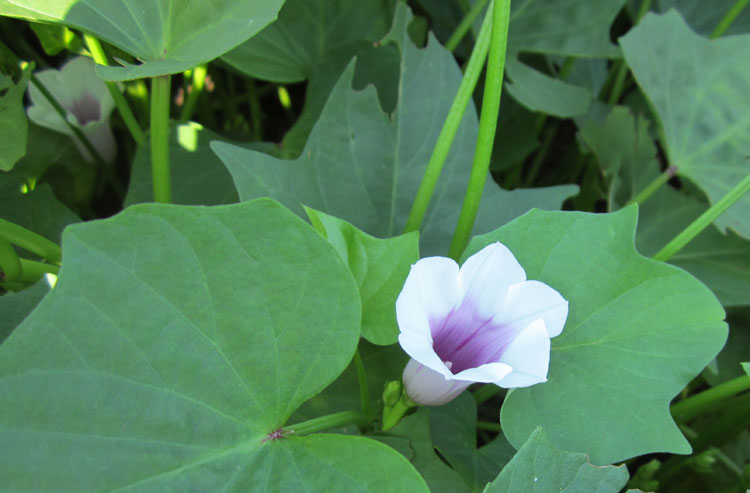
Our very own Georgia Jet sweet potato blossoms  [Photo by Alan Jones]

We wanted a variety that would do well this far north (slightly north of Boston, Massachusetts), but also have a relatively short time to maturity (90 days).  To place an order, click here.

Some important things to keep in mind to Successfully Grow Sweet Potatoes:

1.  Sweet potatoes like a slightly acid soil, prefering a soil pH between 5.0 and 6.5.

2.  Sweet potatoes do much better in very warm soil, so covering your soil with CLEAR plastic prior to planting your slips will help to capture extra solar energy, thus raising the temperature of your soil.

3.  Don’t fertilize your sweet potatoes — doing so will result in lots of foliage, but not necessarily more tubors.  Digging in 2-4″ of compost at planting time will supply sufficient nutrients for a good crop.

4.  IMPORTANT:  Give your sweet potatoes about 1″ of water per week, but, to keep the mature tubers from splitting, DO NOT WATER your plants for 3-4 weeks prior to their harvest date.

5.  Be gentle when digging your sweet potatoes — they grow close to the surface. Their skins are tender and can be easily damaged.

6.  VERY IMPORTANT:  Sweet potatoes develop a much better taste if allowed to cure properly after digging.

For more info on growing and curing your very own delicious and ridiculously nutritious sweet potatoes, see:

http://www.diynetwork.com/how-to/how-to-plant-and-grow-sweet-potatoes/index.html

http://gardening.about.com/od/vegetables/p/Sweet-Potatoes.htm

http://www.motherearthnews.com/print-article.aspx?id=2147495722
Filed Under: Notes to the Future

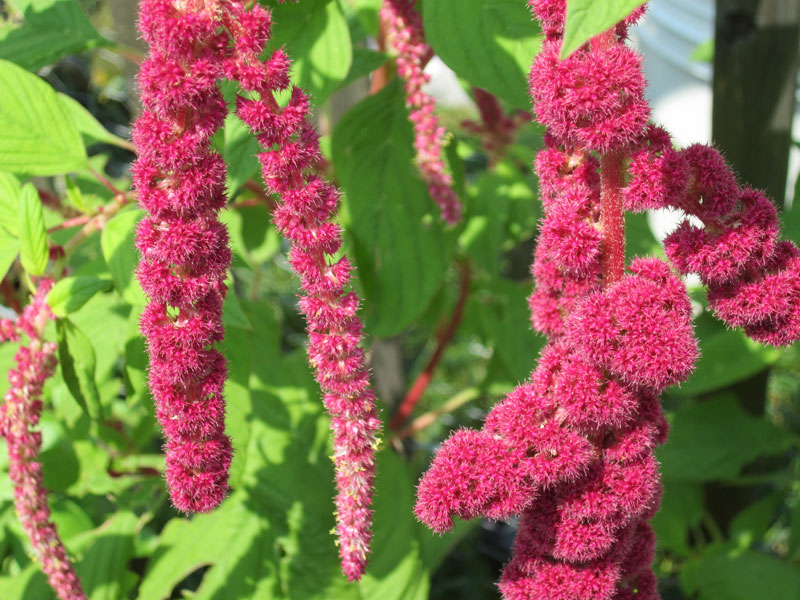
Love Lies Bleeding

August 5, 2012 by Alan

Horrible name, beautiful plant.

Amaranthus caudatus

Filed Under: Uncategorized

Ordo ab chao

August 5, 2012 by Lisa

Managing a cooperative garden is tricky. It’s easy to overlook important, time-sensitive tasks while putzing around wondering what to do next. So we’ve developed a system that lets the Chief Gardening Officers discuss in advance what will be the best use of our limited time at the garden, record it on a whiteboard which we hang from the garden gate at the beginning of the session, and then we can all just work through the list until eveything important has been completed. It saves time, reduces confusion, and makes sure we don’t forget to pick the zucchinis.
Filed Under: Uncategorized

My experiments with fermented foods: the cabbage isn’t “going bad”, it’s getting better and better

August 5, 2012 by Sue

I was intrigued by a recent Terry Gross interview with Sandor Ellix Katz about his book “The Art of Fermentation: An In-Depth Exploration of Essential Concepts and Processes from Around the World”.  Katz explains that fermented foods and beverages have been prepared by humans for over 8000 years.  Fermentation is the process whereby cultures of micro-organisms (usually bacteria or yeast), often microbes already naturally present in the food or surrounding environment, are allowed to establish and grow in the food, enhancing flavor and, Katz believes, providing numerous health benefits.  (Our own bodies normally contain vast — VAST — numbers of living bacteria and other microorganisms, known as our “microbiome”, though this fascinating topic is way beyond the scope of this post.)  As they grow in the fermenting foods, the microorganisms digest carbohydrates and produce byproducts that impart characteristic flavors.  (See “glycolysis” in your biochemistry texts.)  For example, both wine and beer are fermented beverages, with sugars converted by yeast to alcohol (and carbon dioxide).  In the case of some other fermented foods, lactic acid is the product contributing to the characteristic flavor and texture.  Lactic acid gives pickles and sauerkraut their sharp sourness, and the extent of acidity can be controlled, for example, by moving the product to the refrigerator to slow bacterial growth. 


In his book, Katz cites an estimate that up to one third of all foods eaten by people worldwide is fermented!  Some of the most obvious are the foods and beverages mentioned above, and yogurt.  Less obvious are cheese, coffee and bread.  Think of those beautiful, strong-flavored (“tres fort”) French cheeses laced with colorful, happily metabolizing molds.  In bread, the yeast also generate ethanol and carbon dioxide, and the carbon dioxide bubbles help the dough to rise.  Katz’s interview made me realize that I already use fermentation routinely in some of my cooking, for example, in sourdough bread.  I knew already that the sourdough starter that’s been brewing in my refrigerator for well over a year is a living culture  — one that seems to rebel by giving me misshapen bread loaves if I ignore it for too many weeks.  But, I hadn’t quite appreciated its connection to beer, wine or sauerkraut.

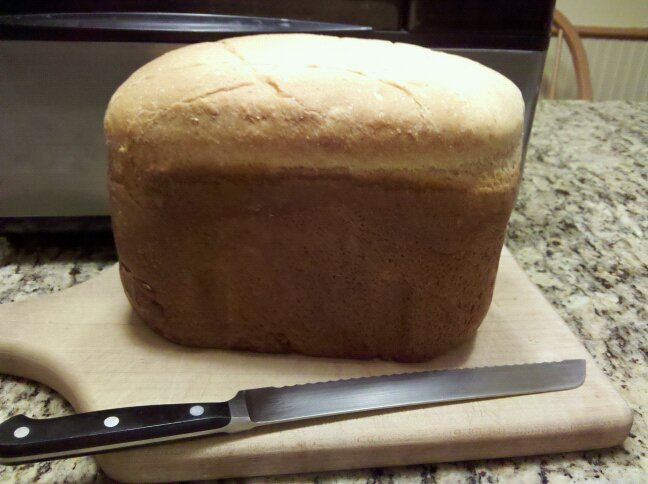
Yeast breads are good examples of fermented foods, since the carbon dioxide, produced as the yeast metabolize carbohydrates in the mixture, causes the dough to rise.  Sourdough breads, like this one, rely even more on fermentation, since the sourdough starter itself is a simmering culture.  
********** 


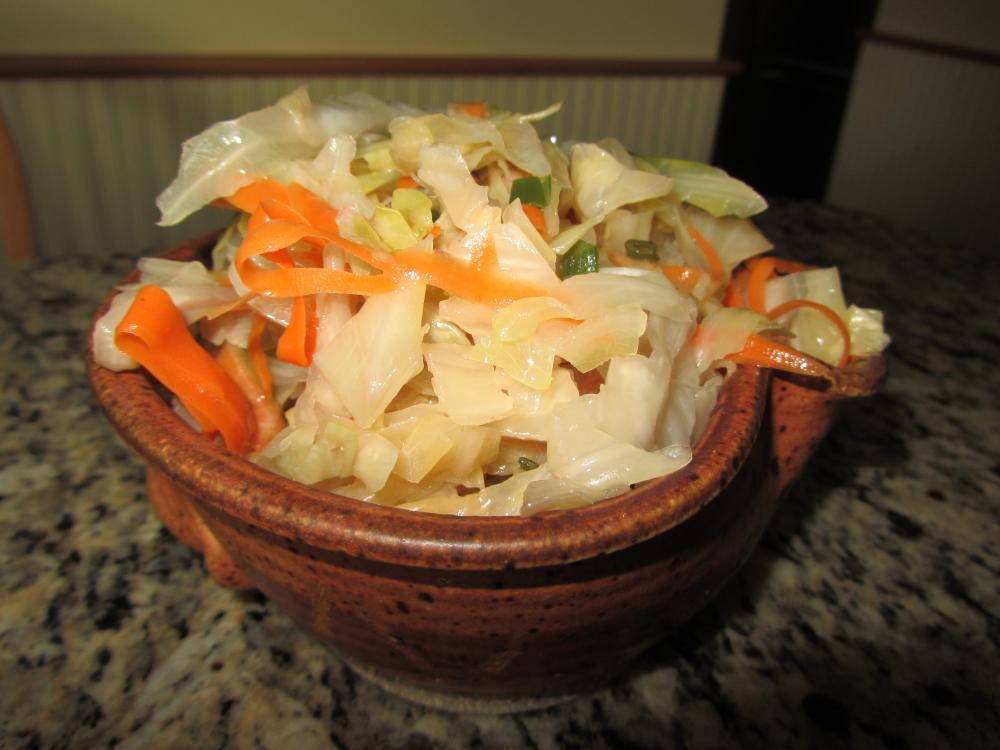
So, I decided to try making other fermented foods, inspired by vegetables growing in our Robbins Farm garden.  Katz told Terry Gross that sauerkraut is the simplest fermented food for the beginner.  Plus, beautiful fresh cabbage is available in our garden and in local farms right now.  I followed the basic procedure suggested by Katz in the radio piece.  Essentially, veggies of choice are salted to extract their juices, these juices are squeezed from the vegetables and they are allowed to ferment in their own juices in a sealed jar.  Katz advises not adding more water unless it is needed to cover the vegetables, because this will dilute the flavor.  I did need to add a little water (he said the vegetables should be covered with liquid) but it did taste pretty good, seasoned only with salt and black pepper.  I used fresh green cabbage, scallions and carrots.  (Because of availability, only the scallions were from our Garden, while the other vegetables were from Busa Farm.)  As Katz had promised, it was a simple dish to make.


My first (only, so far) attempt at sauerkraut, using locally grown green cabbage, scallions, and carrots, and the guidelines described by Katz in his radio interview.  
******

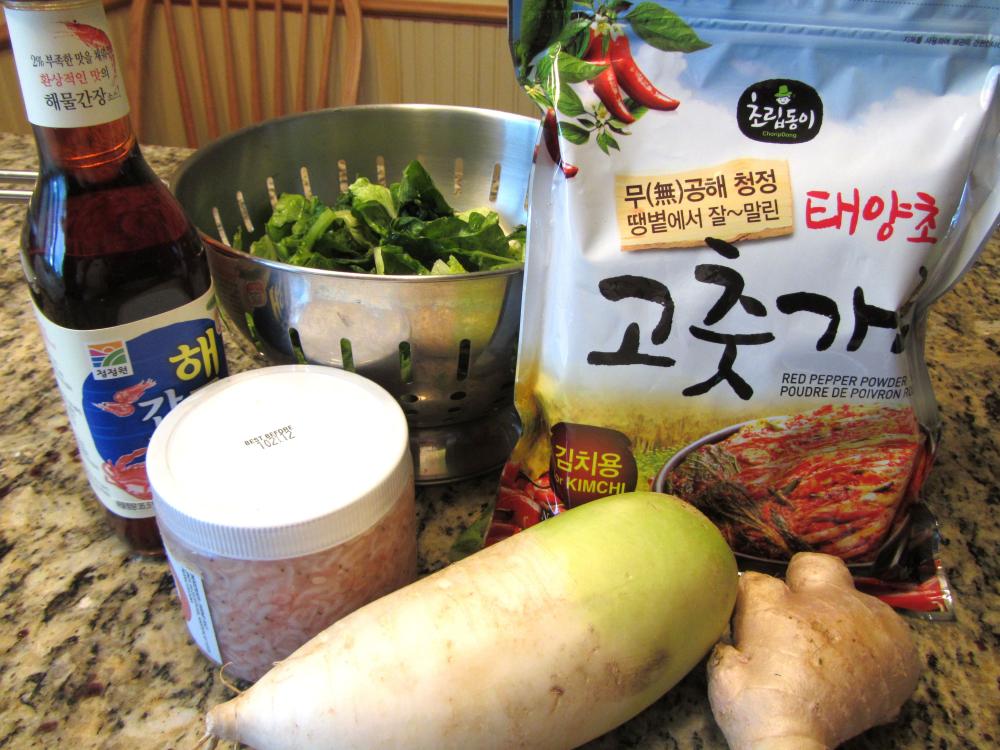
Emboldened by my relative success, I decided to next try making kimchee (or kimchi), the Korean staple that happens to be one of my favorite foods.  There are probably as many different kimchee recipes as there are for wines and cheeses.  Katz didn’t offer a kimchee recipe in his book but I found a recipe online for “Basic Nappa Cabbage Kimchi (Kimchee)” that looked about right.  This time, I was able to use nappa cabbage from our Garden.  I followed the recipe closely, but used half of all ingredients since it was written for 2 lbs of nappa cabbage.  Consult the recipe for further details, but essentially, I began by washing and cutting the cabbage and soaking it in salted water for about 24 hrs, then rinsing and draining it, squeezing out the excess liquid.  This leaves it somewhat wilted in appearance.  Regarding the other ingredients, I first searched a few Asian markets in the Chinatown area (near where I work) but was concerned that the ingredients, especially the fish sauce and red pepper powder, were not necessarily the Korean style.  So, I headed to the amazing, though somewhat overwhelming, H. Mart in Burlington.  Here the selection is great, with separate sections for Korean sauces and other items.  (And, as it happens, H. Mart carries many types of prepared kimchee, sold in jars in the refrigeration cases, or in bulk by the pound.)  To my surprise, even the daikon radish was available in both Chinese and Korean variations, so I took the Korean one.  Both are plump and white, but the Korean had a greenish color at the base.  Again, the red pepper powder selection was huge, with coarse and fine options and many different brands.  I took the one that said “For Kimchi” on it, a coarse grind.  While it was produced in China, it was packaged in Korea and, of course, the “For Kimchi” label gave me comfort that it was the right kind. 


Shown here are several of the ingredients I used for kimchee.  Clockwise from front:  Daikon radish (“Korean” according to H. Mart), wild salted shrimp, Korean style fish sauce, Napa cabbage from the Garden (after soaking in salt, draining and squeezing out excess liquid), Coarse ground red pepper powder (marked “For Kimchi”), ginger root.  Not shown:  scallions

********************

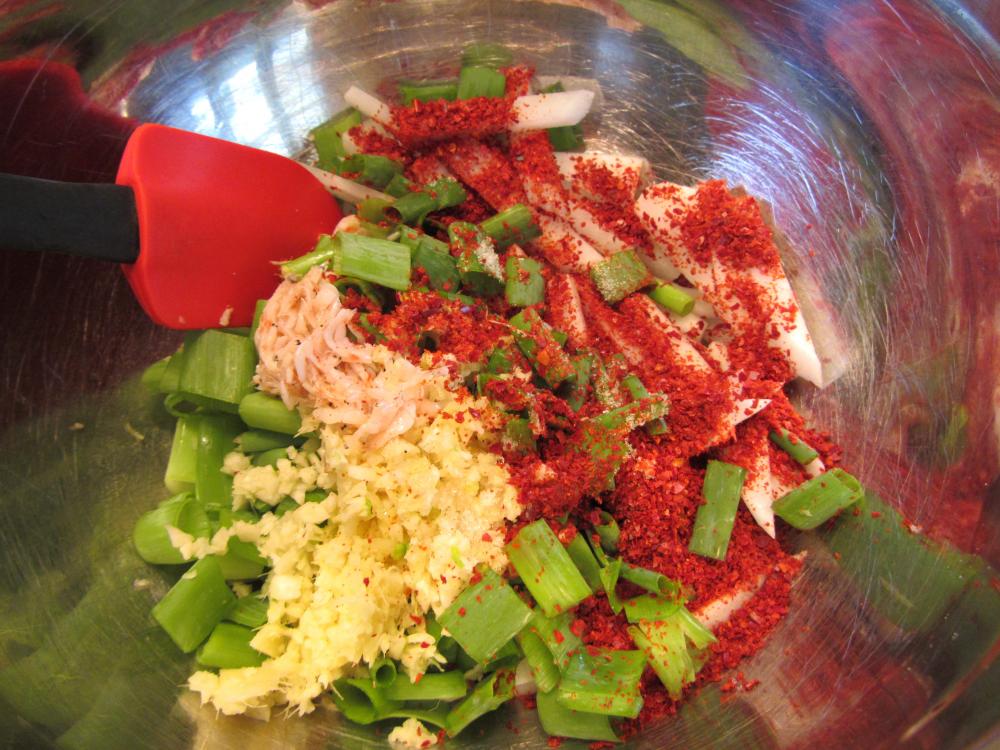
Preparation in progress, prior to adding cabbage and fish sauce to pack into jars.

**********


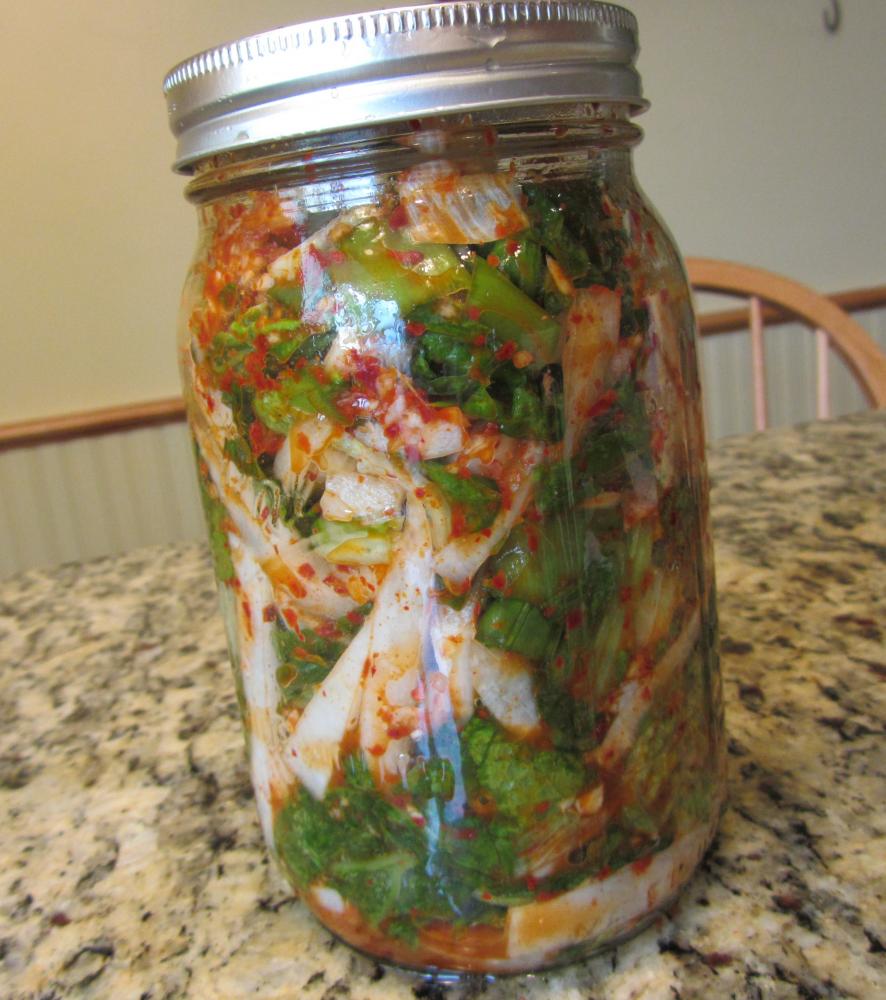
As I write this, my 1 qt jar of kimchee, after brewing in the basement (a cool, dark place) for a little over 24 hrs, is now fermenting in the refrigerator. Before transferring it to the refrigerator, I opened the lid to release the gases; and, there were gases so we’re on the right track!.  To be continued……


Additional tips from my friends who have experience making kimchee: Val Hays has used, and recommends, another Kimchee recipe by David Lebovitz. While similar to the one I used, it does not have the salted shrimp, making it a good vegetarian option. MJ Keeler suggests letting the kimchee ferment in the refrigerator for at least a week, rather than the three days (minimum) suggested by the recipe. As I post this, it’s been in the refrigerator for three days and we haven’t tasted it yet.


Update:  We have eaten some of this.  It is okay, but I am not thrilled with it.  The cabbage is a little tough, and the taste a little bitter.  Today (August 11) I got another half cabbage, shared with Dick.  I am going to try the other kimchee recipe in this post (David Lebovitz).  However, I am slightly concerned that it is our nappa cabbage that is bitter or tough.  We will see…..

p.s. Gardeners:  I have plenty of the red pepper powder and salted shrimp, as well as extra 1 qt canning jars.  Let me know if you want some to try this on your own.

Filed Under: Notes to the Future Tagged With: cabbage

Okra and Air Conditioning

August 4, 2012 by MichaelP

I don’t have air-conditioning at home.  Some summers, there are a handful of days where, to sleep at night, I have to run a fan drafting air directly over me from toe to head.  Last summer I did, but this summer not yet.

Last summer, our "dwarf" okra grew over six feet tall.  This summer it seems resigned to at most two feet.  I think it’s the lack of truly hot nights that has held back the okra:  it just hasn’t triggered it’s growth spurt.  It’s already beginning to flower, so I think now it’s too late.

Plants can "observe" their environment, and integrate (sum up and average) such things as daylight and temperature, by accumulating certain chemicals.  When they build up enough, that triggers a change.  Quite possibly, okra is observing the average temperature, and nightly lows, in order to decide whether to switch to giant growth mode.

So next year, let’s hope I have a few insufferably hot nights in July, so our smart okra decides it’s okay to be a giant!


Filed Under: Uncategorized

Scheduling with a Garden Gantt Chart

August 2, 2012 by Elisabeth

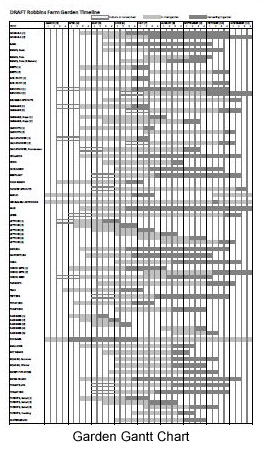
Garden Gantt Chart
 
We’re growing 44 crops in our 2,000 square foot garden this year, each with its own ideal growing schedule in our area. Fortunately, we’ve also been recording our experiences with these crops. (Our 2010, 2011 and 2012 Crops Lists record our planting and first harvest dates.) Now it’s time to put all that information to work.
 
Our first ever Garden Gantt Chart is an attempt to give us a visual, week-by-week schedule for our crops. In the spring, the chart will help us determine which garden beds need to be prepared and planted each week. In summer, it will be helpful to make sure we start our late-season seedlings on time.
 
Multiple plantings of short-season crops (such as Lettuce and Radishes) and space-saving scheduling of different crops in a single bed (such as Peas and Pole Beans) are reflected in the chart. We’ve also included times for starting our own seedlings indoors (something we hope to do more of next year).
 
The chart is still officially in the draft stage. We’ll be adjusting the information as we move through this year’s gardening season. The removal (or last harvest) for the crops wasn’t recorded, so information for later in the season is a bit speculative. Look for a finished version in late fall.
 
Please note: Though this is our third year of gardening this space, it’s our first year of early spring gardening. Planting was delayed our first two years by the need to build the garden from the ground up in April. Permission to leave the fence and garden beds in place last winter allowed our first on-time start this year.
 

Filed Under: Uncategorized

« Previous Page
Next Page »

Primary Sidebar

2026

  • 2026 Crops List
  • 2026 Garden Plans
  • 2026 Garden Schedule
  • 2026 Watering Schedule
  • 2026 Photos

2025

  • 2025 Crops List
  • 2025 Garden Plans
  • 2025 Garden Schedule
  • 2025 Watering Schedule
  • 2025 Photos
  • 2025 Finances

2024

  • 2024 Crops List
  • 2024 Garden Plans
  • 2024 Garden Schedule
  • 2024 Photos
  • 2024 Finances

2023

  • 2023 Crops List
  • 2023 Garden Plans
  • 2023 Garden Schedule
  • 2023 Photos
  • 2023 Finances

2022

  • 2022 Crops List
  • 2022 Garden Plans
  • 2022 Garden Schedule
  • 2022 Photos
  • 2022 Finances

2021

  • 2021 Crops List
  • 2021 Garden Plans
  • 2021 Garden Schedule
  • 2021 Photos
  • 2021 Finances

2020

  • 2020 Crops List
  • 2020 Garden Plans
  • 2020 Garden Schedule
  • 2020 Finances
  • 2020 Photos

2019

  • 2019 Crops List
  • 2019 Garden Plans
  • 2019 Garden Schedule
  • 2019 Finances
  • 2019 Photos

2018

  • 2018 Crops
  • 2018 Garden Plans
  • 2018 Garden Schedule
  • 2018 Photos
  • 2018 Finances

2017

  • 2017 Crops
  • 2017 Garden Plans
  • 2017 Crop Schedule
  • 2017 Photos
  • 2017 Finances

2016

  • 2016 Crops
  • 2016 Garden Plans
  • 2016 Crop Schedule
  • 2016 Finances
  • 2016 Expenses

2015

  • 2015 Crops
  • 2015 Garden Plans
  • 2015 Crop Schedule
  • 2015 Finances
  • 2015 Expenses

2014

  • 2014 Crops
  • 2014 Garden Plan
  • 2014 Crop Schedule

2013

  • 2013 Crops List
  • 2013 Garden Plan
  • 2013 Crop Schedule
  • 2013 Photos

2012

  • 2012 Crops
  • 2012 Garden Plan
  • 2012 Crop Schedule

2011

  • 2011 Crops
  • 2011 Seeds
  • 2011 Garden Plan
  • 2011 Expenses
  • 2011 Project Proposal
  • 2011 Supporters

2010

  • 2010 Crops
  • 2010 Seeds
  • 2010 Expenses
  • 2010 Supporters
  • 2010 Veggie Adoptions
  • 2010 Pilot Project Report

Recipe Collection

Log In

Members Only

  • Contact information
  • Log Out

Copyright © 2026 · Genesis Child Theme for Robbins Farm Garden on Genesis Framework · WordPress · Log in