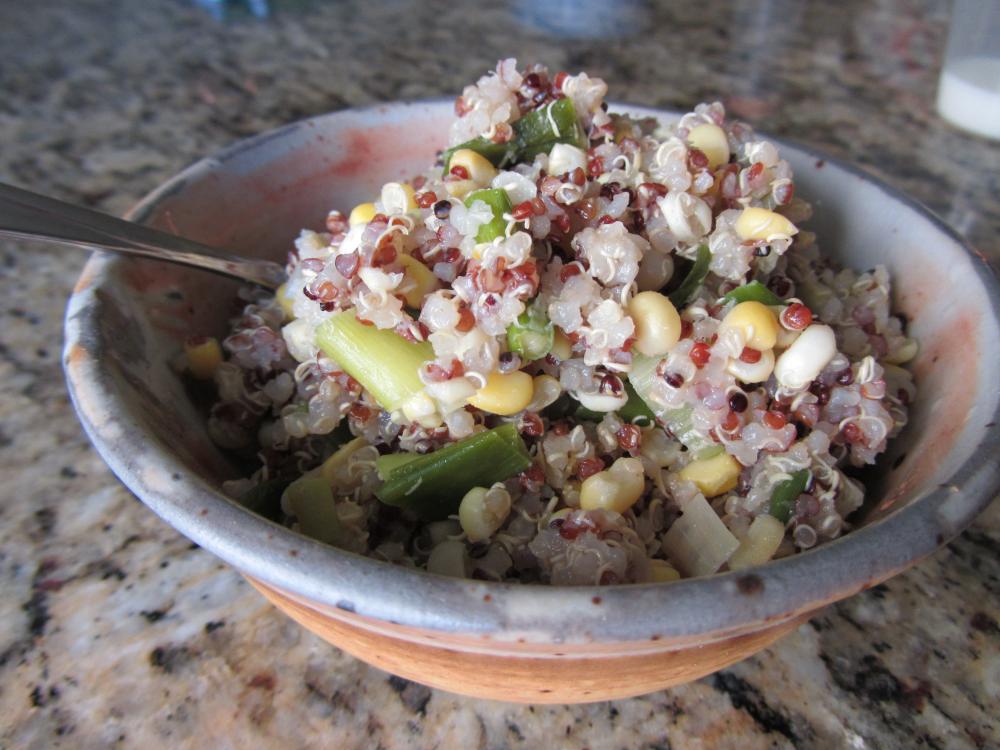
When sweet corn is in season — as it is right now — we eat a lot of it.Usually, we are corn purists: just boil it quickly, sprinkle it with salt or Campmix, and eat it right off the cob. Yesterday, though, I wanted to try something different with our sweet corn, fresh from Busa’s Farm.(In the Robbins garden, the corn in our Three Sisters plot is a decorative popping corn so we can’t use it for this recipe.) With the corn, I bought a bunch of gigantic, freshly picked scallions, also grown at Busa’s.
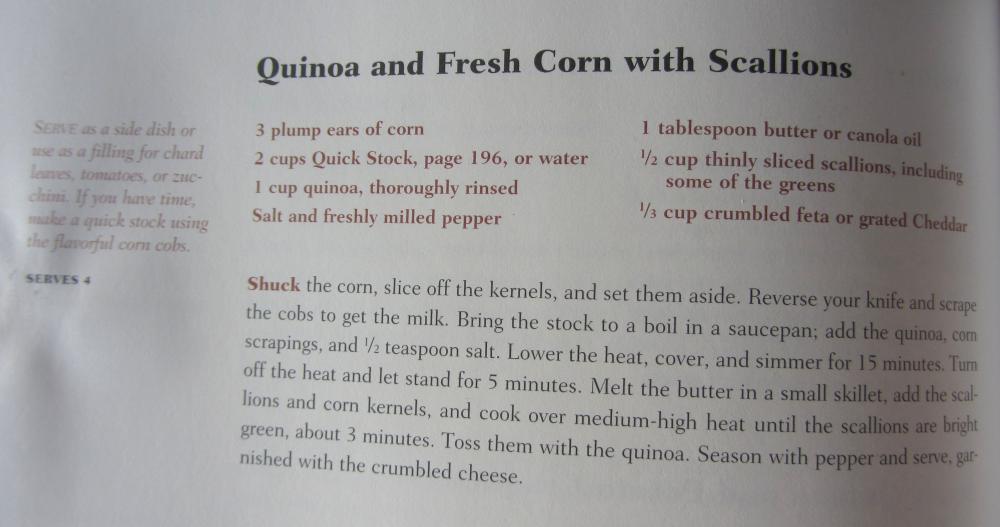
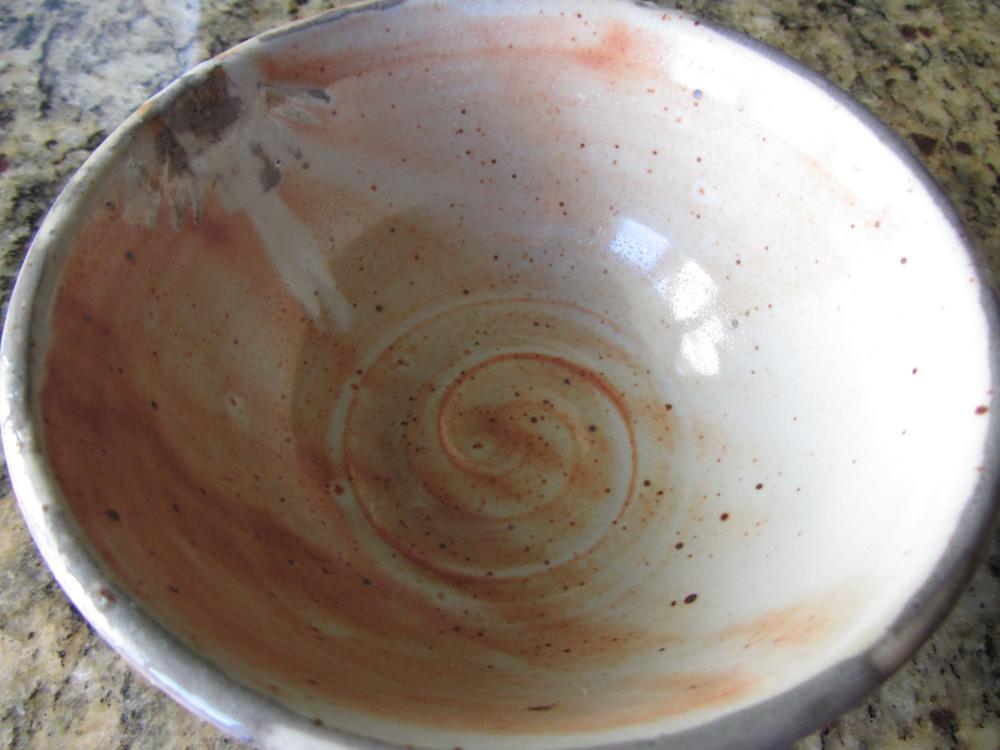
The recipe, Quinoa and Fresh Corn with Scallions is from Deborah Madison‘s “Vegetarian Cooking for Everyone”.(Highly recommended book, by the way!) A photo of Deborah’s recipe is shown, but I varied it slightly. I used more vegetables: 5 ears of corn and 3 of the huge scallions. Instead of the Tbsp butter or canola oil, I used 3 Tbsp Extra Virgin olive oil and 1 tsp butter. I also sauteed the corn and scallions longer than the recipe recommends, til the scallions were wilted. I used an organic tricolor quinoa from Trader Joes. I thought this would be good, but didn’t think it would be SO good. John (who is really into corn in its “purist” preparation and also does not get very excited about some of the grains I like) loved it! We didn’t even add the cheese that the recipe suggests — it was delicious all by itself, seasoned with salt and pepper. We had it as a side dish with grilled fish. By the way, the beautiful bowl in the photos was made by my friend Amy Goldstein, at Mudflat Studio.
Notes to the Future
A Day in the Garden
It started cloudy, but as gardeners arrived, the sun came out in full force. Despite being past 9AM, the far left corner still had a bit of shade from the tall trees at the edge of the Park.
A white board of to-do activities, prepared by the planners, organizes our work. It’s harvesting time! Lush eggplant of both the long Asian and the fat Italian varieties are joyfully picked. Bush beans of all three colors –green, yellow, purple– are available, but the soybeans are not yet ready. Some summer squash, several cucumbers. A debate ensues over how much lettuce to pick, as what we may leave behind may bolt or turn bitter in the hot weather. Our next generation of seedlings were only planted last week, so are not ready for transplant to take the place of the picked lettuce. We also planted more lettuce today. Collard greens are plentifully abundant, although many gardeners prefer the swiss chard.
There is much promise of more to come. The tall corn displays purple and golden tassels. Immature pumpkins and watermelons hide in the trellis of leaves. We added more support (netting them with plastic mesh) to some of them. The winter squash has plenty of flowers, and the Jerusalem artichokes are blooming. The sunflowers seemed to have shaken off the early-season leaf eaters, and are climbing high. And even the weeds are prospering, encroaching from the paths even as the vegetables encroach onto the paths. We’ll have to do something about that.
We applied a spray of a small amount of potassium bicarbonate mixed with water to the squash and watermelon plants. Unlike the last two years, we’ve seen no mildew, so getting an early start at prevention seems to have worked. We did a pH test of the soil near the tomatoes, and added some lime. We’re watching closely for signs of blossom end-rot.
Given yesterday’s rain, the compost was deemed too wet to sift and extract, even though one pile is clearly ready. Instead, we turned both piles, to feed them air.
Water, water, water, says one of the garden planners, who says the fruiting plants (e.g. tomatoes and eggplants) especially want it. No one saw any pests, like the tomato horn worm of last week, and we have some bees buzzing around our flowers.
Not everything picked is 100% perfect. One tomato did not pass the eat-me test. Some parsnips decided to stop growing down after they encountered some rocks.
The biggest surprise of the day was the lack of visitors. Normally we get about twenty, divided between adults and children.
As the white board gets all checked off, people gather for tea, and we start the divvy-up process, a mix today of some things in piles and other things (like greens) taken in turns. Herbs like rosemary and chives are taken separately by those who want them.
As we finish near Noon, the sun decides to go behind the clouds again.
Bolting bok choy
For the second season in a row, our bok choy is bolting, putting out flowers and seed heads instead of developing into the semi-celery-like stalks I’m used to seeing in the market.
After clipping the flower shoots, I tasted one of them and it was pleasing, both tender and tasty — as opposed, say, to the mustard greens stalks, which were way too reedy to eat. Still, it wasn’t bok choy like I’m used to seeing in the market.
I don’t know what, if anything, we can do for these guys, but I would like to put it on our futures list that we investigate: more shade, different variety, lots of gentle encouragment?
As I discussed my concern with a couple of garden mates Saturday, Lisa confided her antipathy for bok choy, and I was glad to have a balance for her beet mania. I love bok choy.
Heat Wave Watering
The weather forecast says hot and sunny for the next week, with no rain. According to conventional wisdom, a vegetable garden needs an inch of rain a week. A good, soaking rain will provide 1/4" or more, so a few days a week sufficiently waters a garden.
Without rain, a vegetable garden needs supplemental watering. In sunny weather particularly, the soil will rapidly dry out. First, do the finger test: poke a finger down to the second knuckle. If it comes out dry, the soil needs watering.
Second, consider the maturity of the plants. Young seedlings do not yet have deep roots, and so depend on moisture at the top. They need watering more frequenty — at least every other day. Mature plants ought to have deeper roots, so as to need watering less frequently. However, unless they get some un-watered days, they don’t have incentive to root deeply. Plants adapt to the watering they are given, so watering every day means you’ll have to continue watering every day.
For our garden mid-season, we have a mix of maturing plants and seedlings. This comes from rotating crops — for example, when the peas came out Saturday, the pole beans went in — and from staggering plantings, so that we get multiple generations of things like carrots and lettuce. So this forces us, in the absence of rain, to water at least every other day.
We prefer to water in the morning, to reduce loss to evaporation in the hotter and sunnier part of the day, and so that the leaves don’t stay wet overnight and acquire mildew. We also prefer to water by hand, with watering cans, to put the water where we want it, and not just throw it up in the air with a sprinkler.
How many watering cans-full do we need to apply? Just how much water does 1-inch a week mean?
A standard bed in our garden is 6′ x 9′. 54 sqft x 1-inch = 4.5 cubic feet of water per bed. 1 cubic foot = 7.5 gallons. Thus, our beds each need 4.5 x 7.5 = 33.75 gallons of water per week. With 1.5 gallon watering cans, that’s around 22-23 full watering cans. That means, when watering, we should water each bed with at least 3 full watering cans — and probably more, since we don’t want to water every day.
Our entire garden is 2000 sqft, with about 60% for growing plants (much of the remainder is used for paths for visitors as well as ourselves). 1200 sqft x 1-inch x 7.5 gallons/cuft = 750 gallons = 500 full watering cans. Watering five times a week means 100 full watering cans each.
This sounds like a lot of water! But compare to how much water you use to shower yourself. A typical modern showerhead has a flow of 2.5 gallons per minute. So the water we need in our garden per week is about the same as showering for 300 minutes. How many showers do you take per week?
Organic Treatment for Blight
Thanks to the Landreth Seed Co. for the following info:
This is a ‘heads-up’. It is not meant to alarm or frighten. The intent is to educate and inform.
During the 2012 gardening season, blight is going to be a problem. Early season, mid season and late season blight are going to be a problem for tomatoes and potatoes and possibly eggplants. The moisture that inundated the United States east coast with Hurricane Irene and tropical storm Lee and the extraordinarily mild winter have combined to create an unusually comfortable environment for the proliferation of blight spores.
Blight is a fungus transmitted by spores which can lay dormant in soil and be carried by the wind as much as 50 miles in a day. Under ideal conditions spores can germinate in ½ hour. The last great outbreak was in 2009, but 2012 may also be a record year.
For those of you who intend to grow tomato, potato or eggplant plants, you MUST take precautions early even if you are organic gardeners. Landreth suggests that you use copper fungicide, a fungicide approved for organic farming. Use the powder form of copper fungicide. Copper fungicide is sold at most garden centers. Dust the soil where you are going to plant your tomatoes, potatoes and eggplants and till the dust into the soil. On the day you plant your seedlings, dust the seedlings, and repeat this dusting every two weeks, for two more dustings.
If you observe signs of blight later in the season, (a spotting of the lower leaves and stems), dust the plants immediately and repeat the dusting in 5-7 days. Copper fungicide is very effective. If you follow the suggested protocols your plants will probably be okay. If you do nothing, or if you wait until late July or August to address this issue, you may lose your entire potato, tomato or eggplant crop.
Unfortunately, we did not know to take the above precautionary measures at the beginning of our gardening season, but it now appears that we may have late blight hitting our potatoes. A few of the plant stems have rotted and collapsed, so we removed them from the garden and destroyed them. We then dug to see what, if any, potatoes may have been formed on the diseased plants. Our gold potato plant yielded only two small (1-2") tubors, while our red potato plant yielded a few small tubors, and eight very small (less than 1") tubors. Many of the remaining plants are showing signs of blight — brown spots on their leaves, and major wilting, so we will begin dusting with copper dust fungicide.
Photo of Late Blight on Potato: plantdiagnostics.umd.edu/_media/client/diagnostics/fullsize/late_blight_potato_l.jpg

For more info on Late Blight: www.ag.ndsu.edu/extplantpath/plant-pest-alerts/potato-tomato-late-blight-start-monitoring-early
For info on using copper dust to control early or late blight, or other plant diseases, go to www.bonide.com/lbonide/backlabels/l771.pdf
You may find the Landreth Seed Co. at: www.landrethseeds.com/
Kale Chips — crispy, salty, good for you, and easy to make!
As of a few days ago, we still had some greens in the garden, particularly kale. Recently, I — a bit of a "gourmet" potato chip fiend — learned of kale chips as a healthy way to satisfy our cravings for crispy, salty snacks! There are many, many recipes to be found online, most calling for oven baking, with a few instead calling for a food dehydrator. I experimented a bit with the oven methods, since many people don’t have a dehydrator and, also, I figured that baking was likely to give more flavor.
The first step is to cut the heavy stem out from the kale leaves. While some recipes I found suggested using a sharp knife, it turns out that you can tear the kale away from the stem readily. Tear the kale into pieces that will be "bite size" once they’re dehydrated. About a 3 to 4 inch dimension seems to work fine.
I washed the kale pieces thoroughly in water, and dried them as well as possible. I used a salad spinner and then blotted them with a towel.
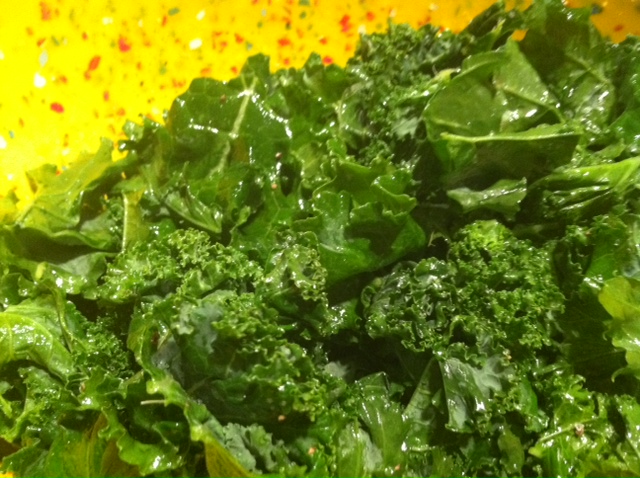
Then, I placed the kale pieces in a bowl, and added some extra virgin olive oil (at least I hope it was EVOO — mine was from Trader Joes). I massaged the olive oil into the leaves, so that all were as evenly coated as possible. Then, I seasoned them generously with sea salt and fresh ground black pepper. The coated kale looks like this:
I then spread the kale in a single-thickness layer on a baking sheet. Some of the videos stressed that the layer must be only one leaf thick, warning that if the kale is piled up, it won’t become crispy. (I chose not to test this theory, so have only tried the single layer.) Before baking, it will look like the photo below, and will shrivel up considerably and darken in color, as described below, as it bakes.
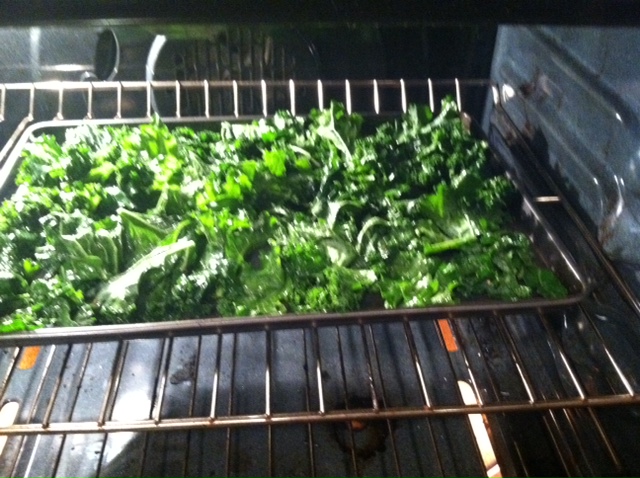
I baked the kale in an oven set for 350 degrees F. Some of the recipes said that only 10 min was needed to get them fully dehydrated and crispy. I tried the recipe in two ovens, and one took at least 15 min and the other took 20. (Both ovens were set on convection, which automatically sets the temperature to 325 degrees. This may have been the issue.) It’s a good idea to just watch them and make sure that they do not burn. They should reach a fairly uniform dark green color, and appear curled up and considerably smaller than the original pieces.
After they’re fully crisped up as described above, the kale chips can be very gently blotted on paper towels to remove excess oil.
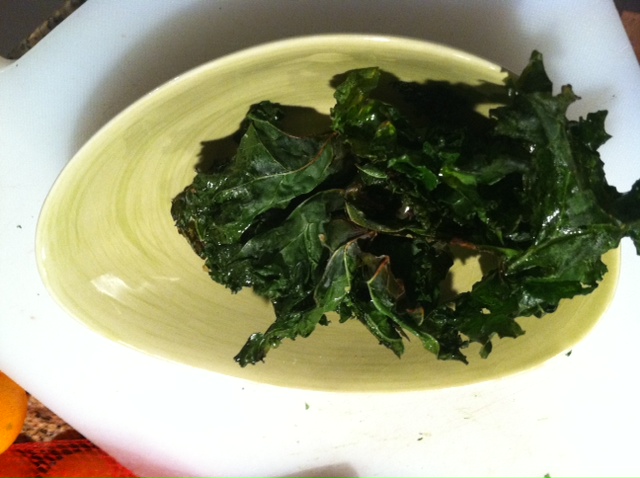
These are incredibly delicious and crispy straight from the oven! Whatever you do, do not store the uneaten chips in a sealed container. This makes them lose their crispiness. If there are any leftover, I would suggest storing them in an open bowl. The finished kale chips, with their dark green color, are shown in the third photo, below. The moistness you see on the chips is residual olive oil. These are definitely finger food, but you will want some napkins handy.
While of course this is best with local, fresh-from-the-garden kale, if you crave this snack "off season", I found that a Trader Joe’s bag of precut and washed kale works great. One bag will fill two large baking trays.
By the way, this is by no means the "perfect recipe" for kale chips. If anybody has variations to suggest based on their own kale chips experiences, please add them in the comments section. I’m also curious about other seasonings, as well as other greens that might also be used to make chips.