Eggplants: a solid year overall, productive and good-quality; the best Italian type yet (Galine) though some had worms; White Egg slower than usual; some leaf damage
Peppers: reasonable year overall, significant leaf damage (beetles?); Lunchbox, King Arthur, Serrano, Thai and Cheyenne productive; Poblano not as productive; Hot Lemon slow but large; consider topping/pruning taller varieties to reduce immature peppers left at end of season
Potatoes: blue most productive, then red, then gold; blue slowest, red fastest; some wilt, but all plants produced; a little beetle damage
Tomatillos: bad early beetle damage, but checking/treating every few days for a few weeks got them through; topped plants end of August, but still had tons of small ones at end of season; research pruning, topping, put on fertilizing schedule next year
Tomatoes: overall very good; don’t plant Sun Gold, Supersweet 100 and Juliet together next year; snakes (dangling from strings) and marigolds worked well (didn’t need CDs). Darkstar had a different type of disease (look up); Brandy Boy did well; look for a new paste type; Ramapo seemed determinate this year; a few seedlings got mixed up as seedlings; smaller-fruited varieties did best
2020 Root Crops (end of season notes)
Beets: first crop: very good, do again; second crop: should have been planted 2-3 weeks earlier (put in where fall broccoli should have been planted) but was super cold-hardy
Jerusalem Artichokes: bad bug damage to leaves early and some mildew, but good flowers; not as productive harvest, with lots of stringy tubers; consider buying fresh stock for replanting in spring
Radishes: first crop ok, but bolted in heat; second crop not as robust as first, try fertilizing more?
Rutabagas: spotty germination (cover seed with remay next year); transplanting seedlings set back timing, but worked well
Sweet Potatoes: seed potatoes planted too closely in tray (slips came up together and couldn’t tell different types apart); harvested tubers were fantastic: large and numerous, despite bunny damage to leaves
Turnips (cooking): very good, do again
Turnips (salad): first and second crops: very good, do again
2020 Squash Family (end of season notes)
Butternuts: Metro PMR productive and larger than usual, feeding schedule good; trimming/thinning of extra leaves helped with air flow and Serenade helped with mildew; new variety (Honeynut) was stunted (probably from bad real estate in 3 sisters bed), try on trellis next year; think about no squash in 3-sisters bed
Cucumbers: productive and healthy until premature die-off from wilt: look for wilt-resistant varieties, research bugs for potential traps
Delicata: more productive than usual; fewer vine borers (alternating planting with butternuts and sticky traps worked well); Serenade helped with mildew; feeding schedule good; long harvest season
Pumpkins: productive and larger than usual (one was enormous); less borer damage due to sticky traps; feeding schedule good
Summer Squash: not as productive as zukes; try fertilizing more; Serenade helped with mildew; vine borer damage not as bad due to sticky traps; look for new variety?
Zucchini: very good, do again; vine borer damage not as bad with sticky traps
Four Pole Bean Varieties
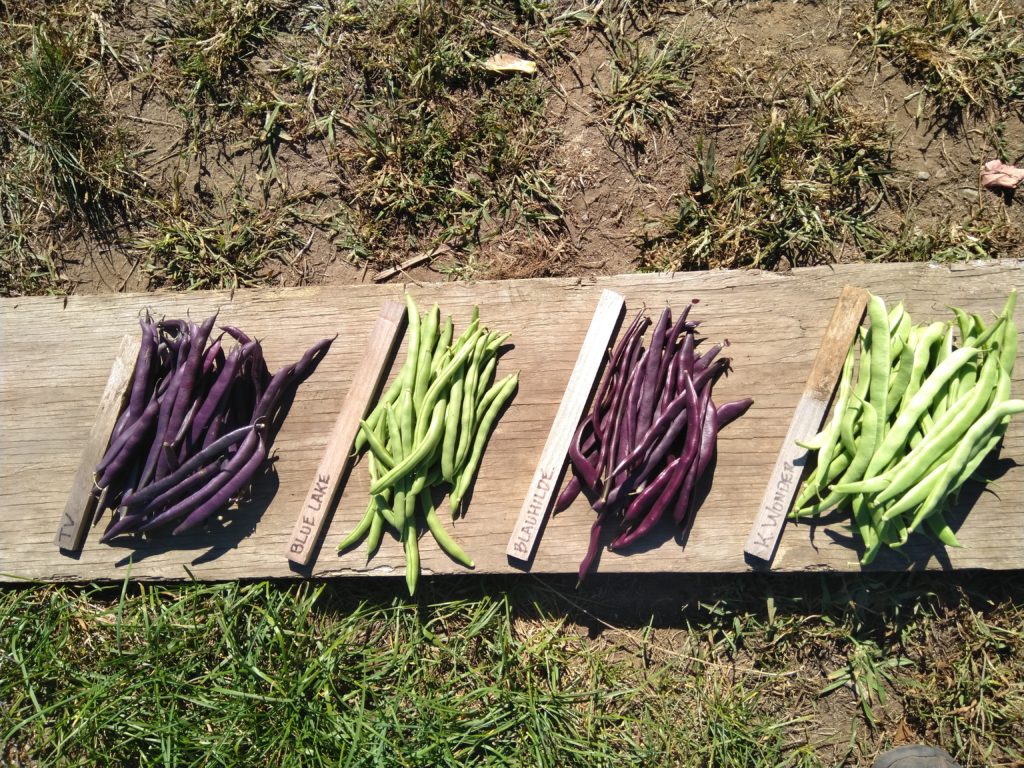
Four pole bean varieties 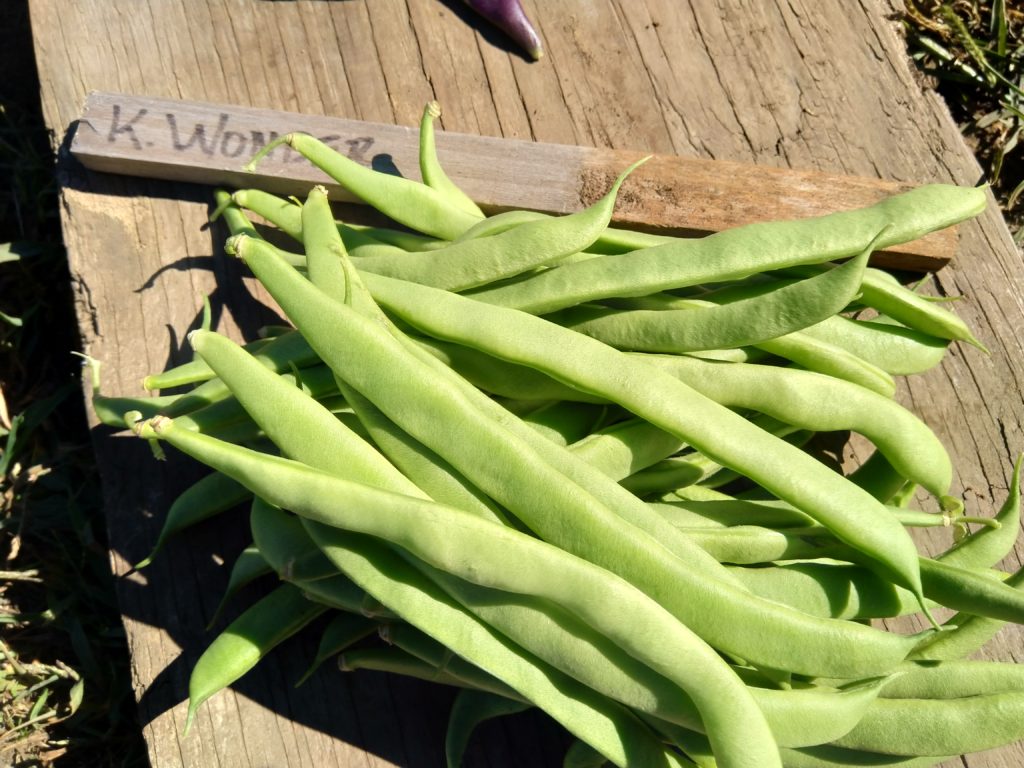
Kentucky Wonder 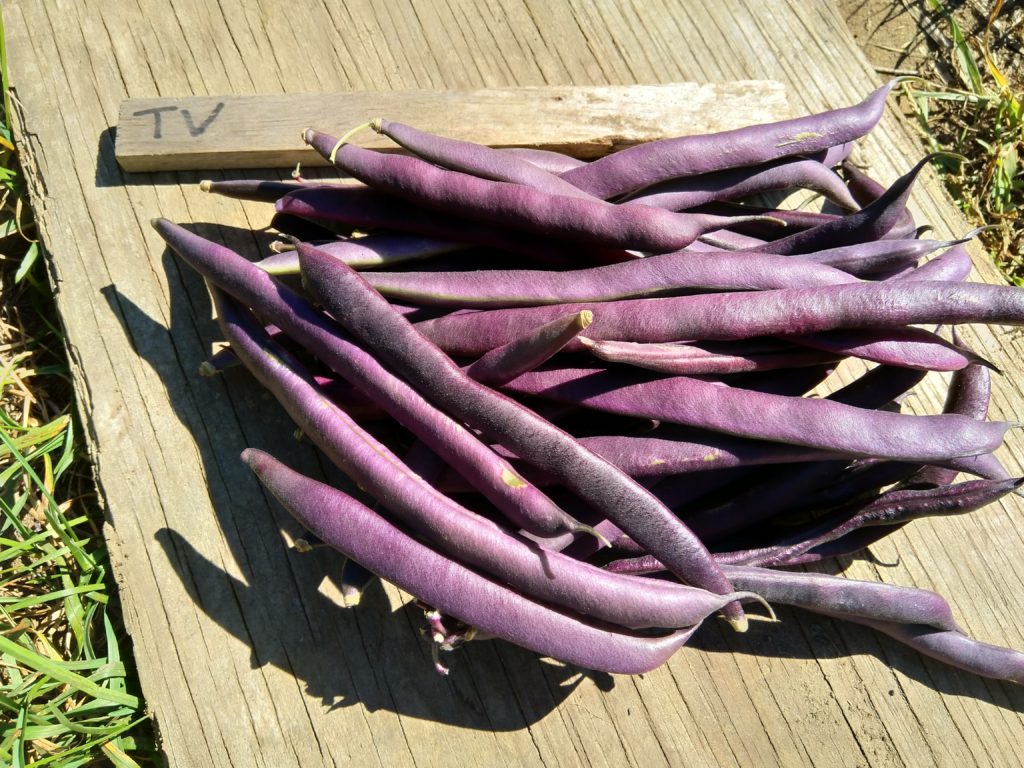
Trionfo Violetto 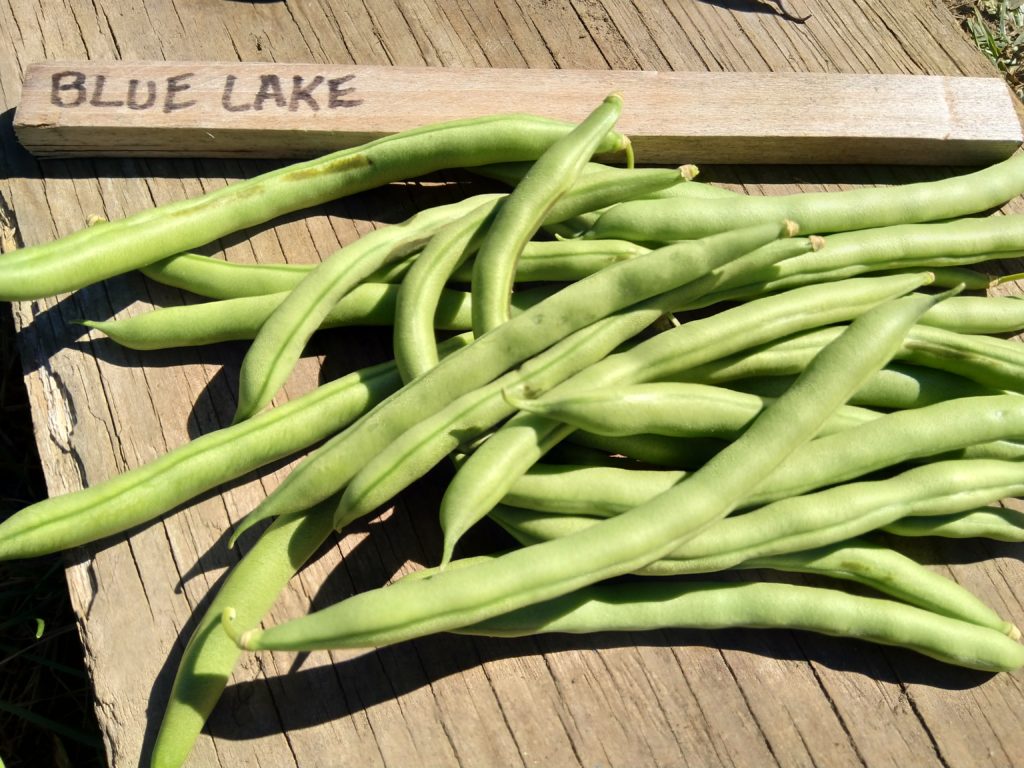
Blue Lake 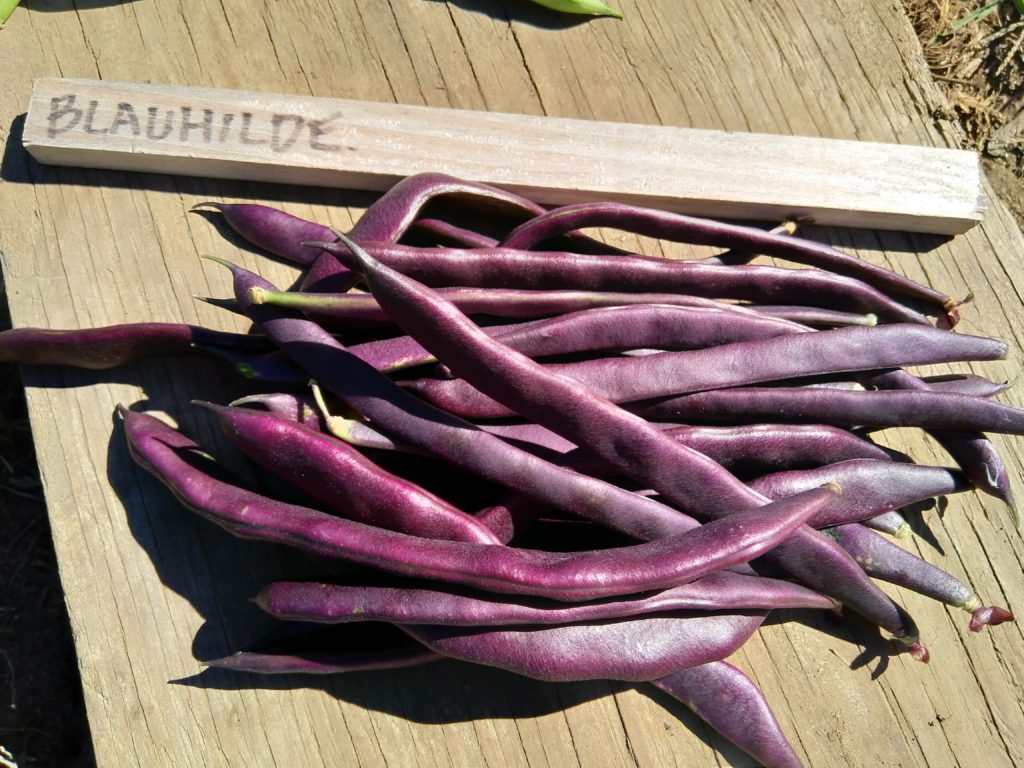
Blauhilde
All four pole bean varieties were harvested this week (Sep 19).
Trionfo Violetto was the earliest to mature and is very prolific. The other three varieties took 2-3 weeks longer to mature, but were all harvestable around the same time. We noticed some thin rusty blemishes on some of the surface of the Blue Lake beans (seen in the close-up picture), but it’s not clear whether the blemishes are a concern.
Lima Beans
One of our experimental crops this summer was Henderson’s Bush Lima Beans from Rohrer. They are described as a prolific heirloom variety with smaller 3-4″ pod.
By early August, the plants were loaded with flowers and beans and they can continue to produce for months until the first frost. Since they have a long growing season and pods can be at different stages of maturity, we weren’t sure how to decide on whether a pod was ready to pick or not.

The pods grow to about 3-inches long and seem to go through 3 stages once they reach that size:
1) relatively immature where the pod is full length, but it is still flat-ish and the beans inside are very small and difficult to shell
2) mature where the pod looks about the same size, but the girth fills out as the beans expand inside
3) dried.
The pods dry out on the plant surprisingly quickly, so the transition from mature to dried might happen in week or so. Some of the earliest dried pods we found had very small beans inside. It was discouraging at first because it seemed to suggest that the limas would be small, no matter how long we waited to harvest them. Fortunately, that wasn’t the case though. After a couple weeks of harvesting, the mature limas beans that we picked were larger.
With the first big lima harvest of the season, I decided to try sorting the beans as I shelled them to try to figure out what signs we could look for when deciding which beans are ready to pick. The biggest limas had a pod that felt full to the touch and I think the shell starts to turn a little paler green in color like the unshelled pods in the second column of this photo:
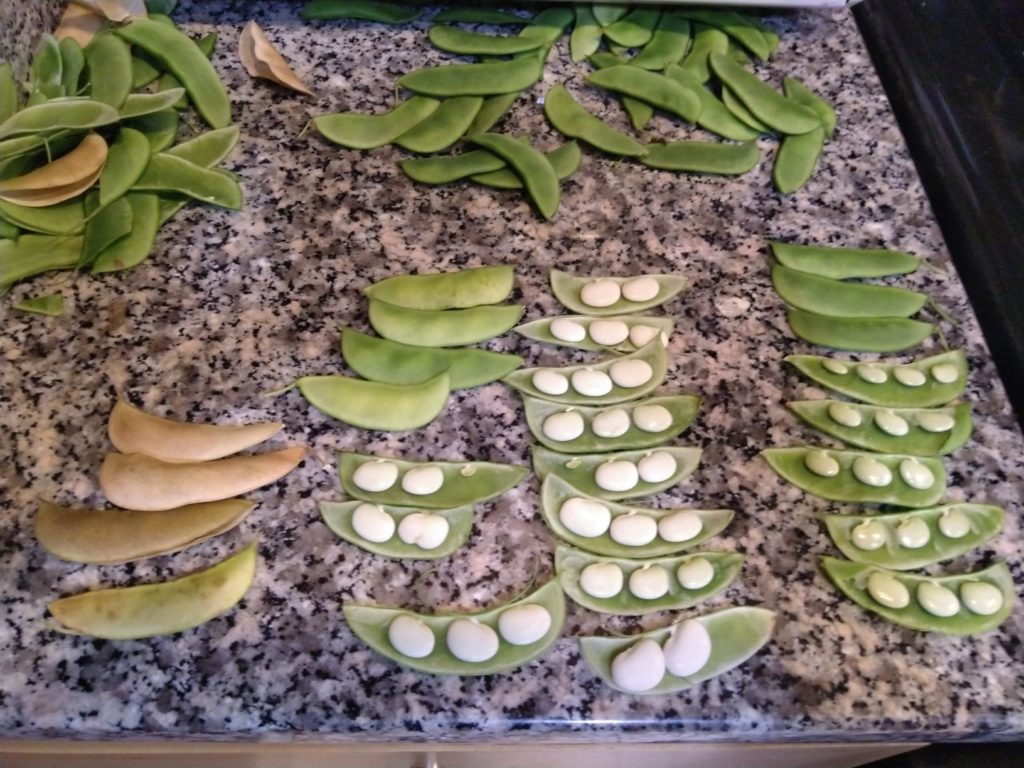
On the left are the dried beans. Those are easy to tell apart. In the middle are the mature beans. Most of the mature pods were plump to the touch. On the right are the less mature beans which were a deeper green on the outside. These took a lot more effort to get out of the shell and the beans inside were smaller and still a little green instead of the bright white color of the mature limas. It was tricky to tell some of these immature pods apart from the mature ones because the immature ones had also filled out, and were plump to the touch. I found the slightly yellow/pale color on the plump pods to be the best clues that the pod was mature and would shell easily.
Both the green and white limas tasted good. The main difference was the size of the bean and the effort to shell them.
Take way: Harvest pods when they are plump to the touch and the color is just starting to pale (lighter green).
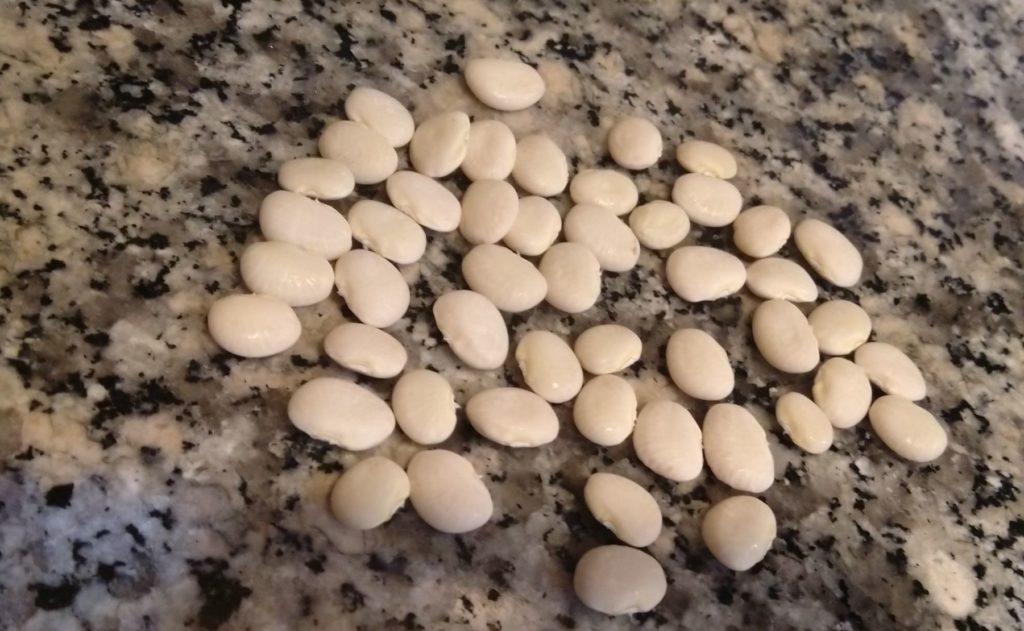
In the end, I had a nice pile of shelled limas, some were big, others small; some had turned white, others were different shades of green:

I just boiled the limas and served them with salt and pepper. They all tasted pretty good, even the little green ones!
As for the dried beans, they were extremely easy to shell but there are only a few of them, so not sure how the dried ones taste yet. Interestingly enough, the dried beans seem to be a little smaller than the mature limas. Perhaps they shrink a little as they dry out?
Fence update
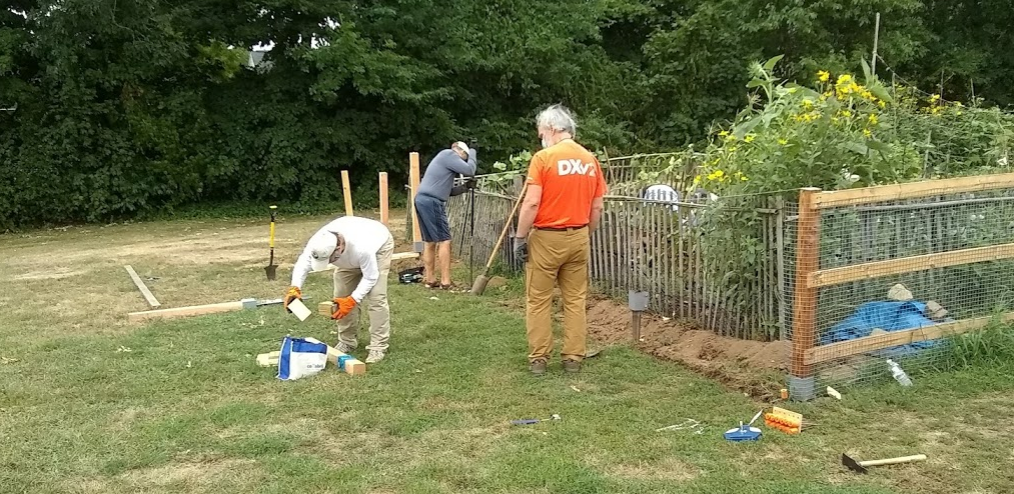
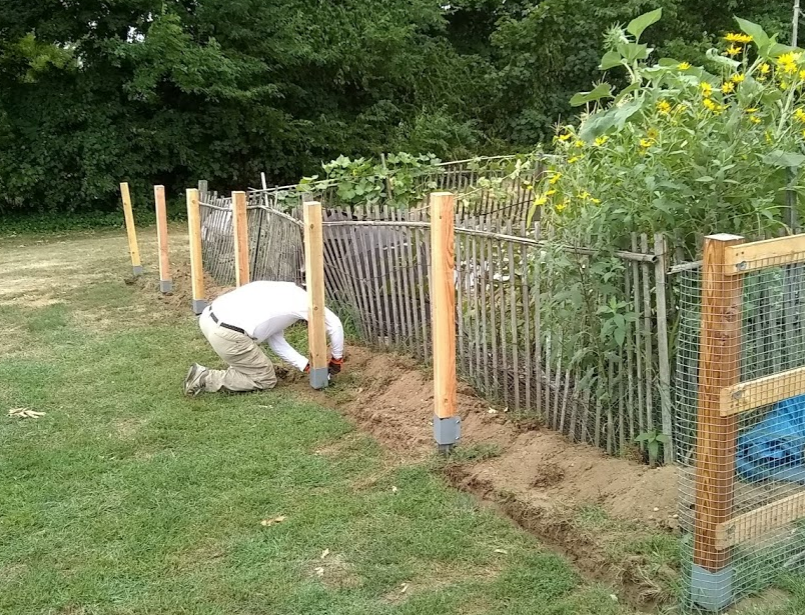
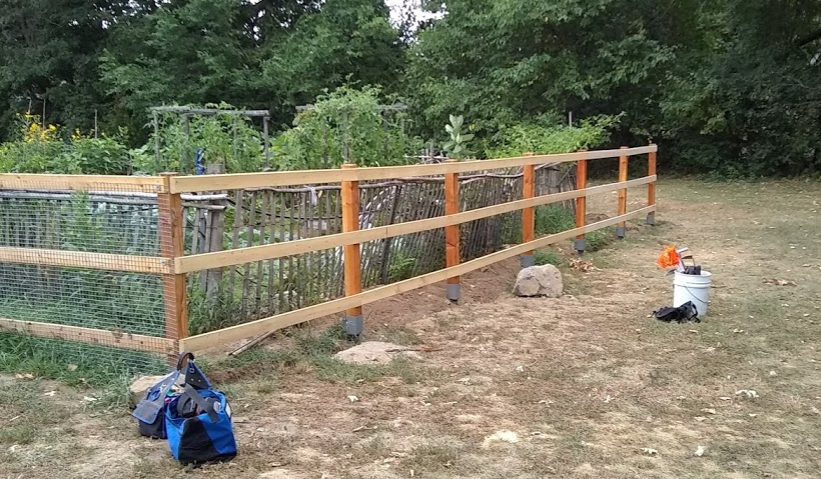
Mike, Michael and David planted all five of the new fence posts on the far side of the garden in one day! (Well almost – one still needs some digging). I (Alan) finished the rails on the Eastern Ave side. If the weather is good Tuesday evening, I’ll oil the rails, and should be ready to hang the fence fabric next Saturday. I have no doubt now we can finish this season.
The general fence-building process is:
- Measure and plant the metal post bases, in a reasonably straight line, evenly spaced, right height, and plumb. Every so often we get lucky and just pound one straight down without any digging. Most of the time we need to dig a hole, get the post base in the right position, and pack the hole with rocks and dirt to hold it firm.
- Cut a notch in each 4×4 posts for the irrigation lines and paint them with raw linseed oil.
- Cut and fasten the 1×4 rails, making everything nice and square, and paint them with raw linseed oil.
- Screw and staple the 1×1 hardware cloth to the posts and rails and trim up the edges.
- And when the new fence is finished, we need to disassemble and dispose of the old one.
A couple of challenges left – we’re recycling about five post bases that are currently holding up the old posts, so we need to at least partially disassemble the old fence to finish the new one; what do we do with the Philosopher’s Stone?